The data intelligence feature lets you target different sets of customers on the same mailing by adding a control field into the Address list to let you choose the specific documents that each receives.
The Data Intelligence option will appear at the bottom of the screen whenever it is available as an option. Docmail is capable of far more than simply mail-merging address data and adding names within content.
In this article we’ll show how to create a stylish, dynamic mailer using Word® that targets two different sets of customers using the same document, by adding extra tags into the Address list to select the appropriate copy, styles and images for each.
We’ll show you:
- How to create the Word document.
- How to add dynamic tags to your Excel Address list.
- How to combine both within Docmail to target each set of customers within a single mailing.
Let’s start by setting up and preparing the Word® document.
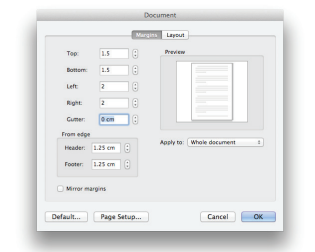
We are going to look at how Docmail uses data intelligence to add variable data, styles and images. Firstly we need to create a new A4 document in Word. This will carry the content variations we want to use. Adjust the margins to fit our background as shown below:
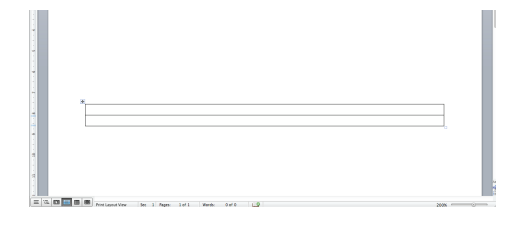
Create a simple two row table the full width of the page with just one column. Docmail uses table cells to contain copy variations. This will be our greeting variation. Drag the table into position leaving enough space at the top for the Docmail address panel (see Docmail A4 template) and adjust the point size and font to one you want.
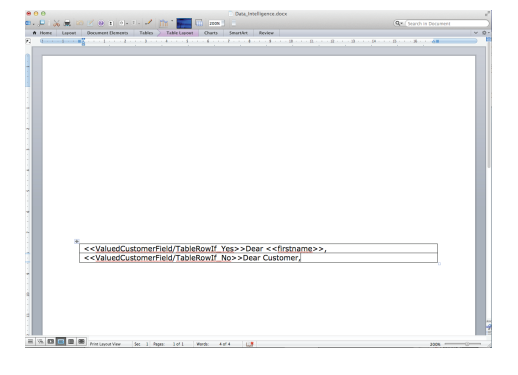
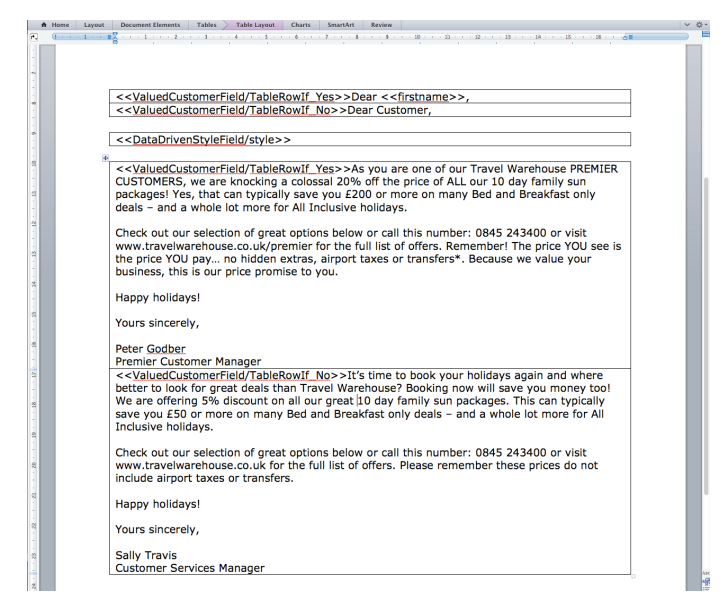
We are going to target ‘valued’ versus ‘ordinary’ customers in our mailing so we will tag the data in the first table row “ValuedCustomerField”.
We like our valued customers a lot so we are going to address them by their first names. ‘Firstname’ is a basic Docmail tag that pulls this information from the address file which we will create in the next section.
Row 1 should contain: <>Dear <>, We may not know the first names of our ordinary customers so we will adjust the greeting to something less personal by copying the tag, but changing ‘yes’ to ‘no’ and following it with ‘Dear Customer’. Row 2 should contain: <>Dear Customer, When the mailing list data file is created later for each address, a column will be included called ValuedCustomerField.
This will contain the value “Yes” if the customer is a valued customer and “No” if the customer is a standard customer.
For valued customers we will start the letter by their firstname. For standard customers, we will start the letter with ‘Dear Customer’.
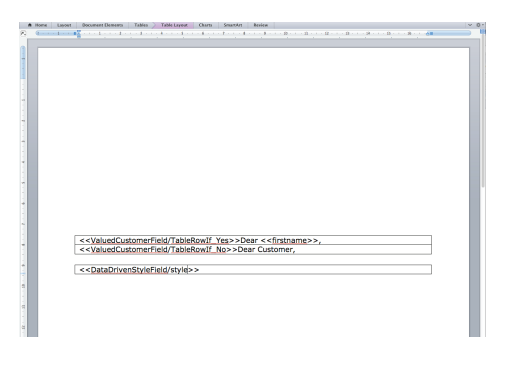
Now we want a heading.
We are going to pull both the variable content AND the visual style of the heading from our address database.
Create a single row, single cell table and position it below the greeting table. Type in the following tag: <> When docmail comes across this tag it will pull the data as usual from the spreadsheet but it will notice that the <style> is a special command.
It will process anything contained in the data field “DataDrivenStyleField” as html. This allows changes in font colour/size/decoration etc.
Only basic html formatting can be used right now.
Now we need a two row single column table to contain our message.
Position this underneath the heading table and type in the same tags we used in the greeting table.
Row 1: <<ValuedCustomerField/TableRowIf_Yes>>
Row 2: <<ValuedCustomerField/TableRowIf_No>>
Where customer valued field tag is “Yes”, paste in the message you wish to give your valued customers directly after the tag.
Where the customer valued field tag is “No”, follow it with the message for ordinary customers as shown in the example below:
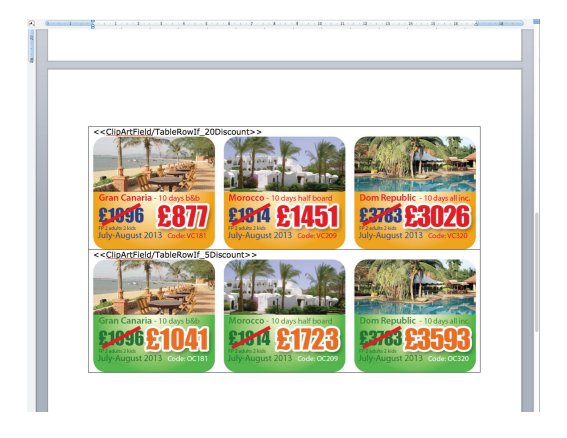
A final table will be added to the Word document (one column, two rows) and a field from the mailing list data which we will call “ClipArtField” will be used to select the correct image from the two we have created for our target audience.
Position this table below the message table.
In our example we have created two different graphics that show special offers. The first we have called 20Discount and the tag for this reads:
<<ClipArtField/TableRowIf_20Discount>>
Once we have typed this tag into the first table row, locate your 20Discount image and place it immediately after the tag. Repeat this in the second table row but using the 5Discount tag and graphic:
<<ClipArtField/TableRowIf_5Discount>>
If the value of “ClipArtField” in the address list is 20Discount it will show the table row with the 20Discount image and similarly the 5Discount image will be shown when that value is present.
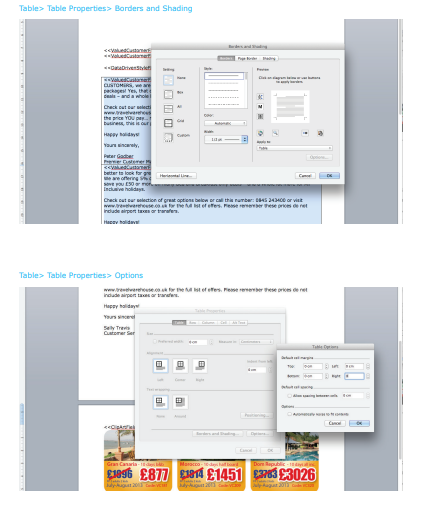
Finally, we need to tidy the look of the document by setting any table borders to “none” and any default cell margins to “0 cm”.
Table> Table Properties> Borders and Shading
In order to deploy the intelligent features we have created within our mailing document, we need to create an address database of customers - or modify and existing one - and add the relevant tags and style elements.
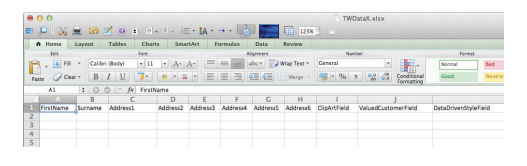
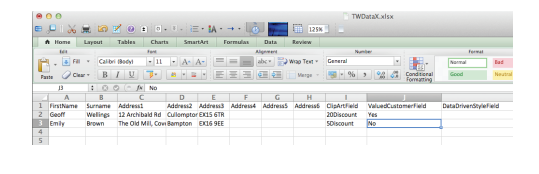
To start with, type in or paste the common headings first (Firstname, Surname, Address1, Address2, Address3, Address4, Address5, Address6, etc).
Next, type in the field names we created in our Word document into the next three cells on the first row:
- ValuedCustomerField
- ClipArtField
- DataDrivenStyleField
Docmail uses the top row to identify the information in the following rows, making sure it goes into the right place in our document. In the case of Data Intelligence, these are the instructions to pick the appropriate table cell containing our copy.
So now we have our headings, let’s add two customers - one who spends a lot fairly frequently and one who doesn’t! In the Valued Customer field, you’ll remember that we have two variables, “yes” and “no”.
Add “yes” to the first valued customer and “no” to the second. In the Clip Art field we called one variable “20Discount” and one “5Discount”.
Add “20Discount” to our first valued customer and “5Discount” to the second.
The Data Driven Style field is a bit more complicated and it helps to know some basic CSS - formatting code used by web sites.
There’s plenty of information about this around on the internet, but for now, copy this example. Start with a single angle-bracket (<), followed by the words “span style”, then and equals sign (=) and speech marks (“).
We then add the style tags. Firstly the colour we want our heading to be... Let’s go for gold (color:#d98639), then it’s font (font-family:trebuchet), size (font-size:24pt), and finally it’s weight (font-weight:bold). Separate these by a semi-colon (;) and close the statement with speech marks again (“) then closed angle bracket (>).
We finish off the style statement by adding a forward-slash, then the word “span” again and enclose both of these with angle brackets (</span>).
This now targets just the heading we are now going to type. Type in something eye catching between both sets of angle-brackets.
<span style=”color#d98639; font-family:trebuchet; font-size:24pt; font-weight:bold”>Heading for valuable customers here!>
To save all that typing, just copy and paste the whole cell into the cell beneath and change the bits we want to look different. In this example, the hex value of the colour.
Let’s make it blue this time (color:#7aa4ca). Don’t forget to change the copy to target our less favoured customers.
<span style=”color#7aa4ca; font-family:trebuchet; font-size:24pt; font-weight:bold”>Heading for less favoured customers here!>

Take a look at the article called:
Uploading your data intelligence files to Docmail
To find out how to create your “Data intelligent” mailing.